Introduction
Hey there! Today I want to share with you one of my all-time favorite recipes: Baked Caesar Chicken. This dish is a true crowd-pleaser in my household, and I’m sure it will be in yours too. The combination of tender chicken, flavorful caesar dressing, and crispy breadcrumbs is simply irresistible. Plus, it’s incredibly easy to make! So, let’s jump right into it and get cooking!
Why You’ll Love This
I make this Baked Caesar Chicken when I need a quick and delicious meal that everyone will enjoy. The flavors are rich and satisfying, and the chicken turns out perfectly moist every time. My family goes crazy for this because it’s like having a restaurant-quality dish right at home. And the best part? It requires only a handful of ingredients and minimal effort. Trust me, once you try this recipe, it will become a regular in your weekly meal rotation!
Ingredients

For this Baked Caesar Chicken recipe, you’ll need:
- 4 boneless, skinless chicken breasts
- 1 cup caesar dressing
- 1 cup breadcrumbs
- 1/2 cup grated Parmesan cheese
- 1 tablespoon olive oil
- Salt and pepper to taste
Optional substitutions: If you’re in a hurry, you can use store-bought caesar dressing instead of making it from scratch. I sometimes like to switch things up and use Italian dressing for a slightly different flavor profile. Feel free to experiment and find what works best for you!
Directions
1. Preheat your oven to 375°F (190°C).
2. Season the chicken breasts with salt and pepper on both sides.
3. In a shallow dish, combine the breadcrumbs and grated Parmesan cheese.
4. Dip each chicken breast into the caesar dressing, making sure it’s fully coated.
5. Press the chicken breasts into the breadcrumb mixture, coating them evenly.
6. Heat olive oil in a large oven-safe skillet over medium-high heat.
7. Add the chicken breasts to the skillet and cook for 3-4 minutes on each side, or until golden brown.
8. Transfer the skillet to the preheated oven and bake for 20-25 minutes, or until the chicken is cooked through and the breadcrumbs are crispy.
9. Remove from the oven and let the chicken rest for a few minutes before serving.
10. Serve hot and enjoy!
Notes
Through trial and error, I’ve discovered that using freshly grated Parmesan cheese gives the breadcrumbs an extra boost of flavor. It’s worth the extra effort, trust me! Also, don’t worry if the chicken looks slightly weird when you transfer it to the oven. The breadcrumbs will turn golden brown and crispy during baking, giving it a delicious texture.
Variations
I love experimenting with different flavors in this recipe. One variation I’ve tried is adding a sprinkle of dried Italian herbs to the breadcrumb mixture for an extra kick of flavor. It worked beautifully and added a lovely aromatic touch to the dish. However, I once attempted using cornflakes instead of breadcrumbs, and let’s just say it didn’t turn out as well as I had hoped. Stick with the classic breadcrumbs for the best results!
Equipment
You’ll need an oven-safe skillet for this recipe. If you don’t have one, no worries! Simply transfer the chicken breasts to a baking dish after browning them on the stovetop. It might take a few extra minutes in the oven, but the result will be just as delicious!
Storage Information
This Baked Caesar Chicken can be stored in the refrigerator for up to 3 days. However, in my house, it never lasts more than a day! The leftovers make for a fantastic lunch the next day, either on their own or in a sandwich. Trust me, it’s just as tasty!
Serving Suggestions
I personally love serving this Baked Caesar Chicken with a side of roasted vegetables and a fresh green salad. The combination of flavors and textures is simply delightful. In my family, it has become a tradition to enjoy this dish on Sunday evenings while catching up on our favorite TV shows. It’s the perfect way to end the weekend on a delicious note!
Pro Tips
Through my own mistakes, I’ve learned a few valuable lessons when making this recipe. One time, I tried rushing the browning step on the stovetop, and the chicken ended up being undercooked in the center. It’s important to take your time and ensure the chicken is cooked through before transferring it to the oven. Trust me, it’s worth the wait for perfectly cooked chicken!
FAQ
Q: Can I use bone-in chicken for this recipe?
A: Absolutely! Bone-in chicken will work just as well. Just make sure to adjust the cooking time accordingly to ensure it’s fully cooked.
Q: Can I freeze the Baked Caesar Chicken?
A: While you technically can freeze it, I wouldn’t recommend it. The texture of the breadcrumbs might become soggy after thawing and reheating. It’s best enjoyed fresh!
Q: Can I use a different type of cheese?
A: Definitely! While Parmesan cheese adds a deliciously nutty flavor, you can use any grated cheese of your choice. Cheddar or mozzarella would work well too!
Q: Can I make my own caesar dressing?
A: Absolutely! Making your own caesar dressing allows you to customize the flavors to your liking. Plus, it’s incredibly easy to make with just a few simple ingredients. However, if you’re short on time, store-bought caesar dressing works perfectly fine too!
Q: Can I use this recipe for chicken tenders instead of whole chicken breasts?
A: Of course! Chicken tenders are a great option if you prefer smaller portions or want to serve them as appetizers. Just adjust the cooking time accordingly, as they will cook faster than whole chicken breasts.
Q: Can I use gluten-free breadcrumbs?
A: Absolutely! Gluten-free breadcrumbs will work just as well in this recipe. It’s a fantastic option for those with dietary restrictions or preferences.
Q: Can I make this recipe without breadcrumbs?
A: While breadcrumbs give the chicken a crispy coating, you can omit them if you prefer. The chicken will still be deliciously flavored with the caesar dressing. Just note that it won’t have the same crispy texture.
Q: Can I use skin-on chicken for this recipe?
A: Definitely! Skin-on chicken will add an extra layer of flavor and moisture to the dish. Just make sure to adjust the cooking time accordingly to ensure it’s fully cooked.
Q: Can I use this recipe for other types of meat?
A: Absolutely! This recipe works well with other meats like pork chops or even fish fillets. Just adjust the cooking time accordingly to ensure they are fully cooked.
Q: Can I use this recipe for grilling?
A: While this recipe is specifically designed for baking, you can adapt it for grilling. Simply marinate the chicken in the caesar dressing for a few hours, then grill it over medium-high heat until cooked through. The result will be deliciously charred chicken with all the flavors of the original recipe!
Q: Can I add additional seasonings to the chicken?
A: Absolutely! Feel free to add your favorite herbs and spices to the chicken before browning it. It’s a great way to customize the flavors to your liking!
Q: Can I make this recipe spicy?
A: Absolutely! If you enjoy spicy flavors, you can add a sprinkle of chili flakes or a dash of hot sauce to the caesar dressing before coating the chicken. It will give the dish a nice kick!
Q: Can I use this recipe for meal prep?
A: Definitely! This Baked Caesar Chicken is a great option for meal prep. Simply cook a batch of chicken breasts following the recipe, then store them in separate containers for easy grab-and-go meals throughout the week. It’s a delicious and convenient way to stay on track with your healthy eating goals!
Q: Can I use this recipe for a dinner party?
A: Absolutely! This Baked Caesar Chicken is a versatile dish that can easily be dressed up for a dinner party. Serve it alongside some roasted potatoes and steamed vegetables for an elegant and crowd-pleasing meal!
Q: Can I use this recipe for kids?
A: Definitely! Kids love the mild and familiar flavors of this Baked Caesar Chicken. It’s a great way to introduce them to new flavors in a comforting and approachable way.
Q: Can I add vegetables to this recipe?
A: Absolutely! Feel free to add your favorite vegetables to the skillet when browning the chicken. Bell peppers, zucchini, and cherry tomatoes work particularly well. They will absorb the flavors of the caesar dressing and complement the chicken beautifully!
Conclusion
There you have it – a deliciously simple and flavorful recipe for Baked Caesar Chicken. I hope you give it a try and enjoy it as much as I do. It’s the perfect dish for any occasion, from weeknight dinners to special gatherings. So, gather your ingredients, preheat that oven, and get ready to indulge in a truly mouthwatering meal. Happy cooking!
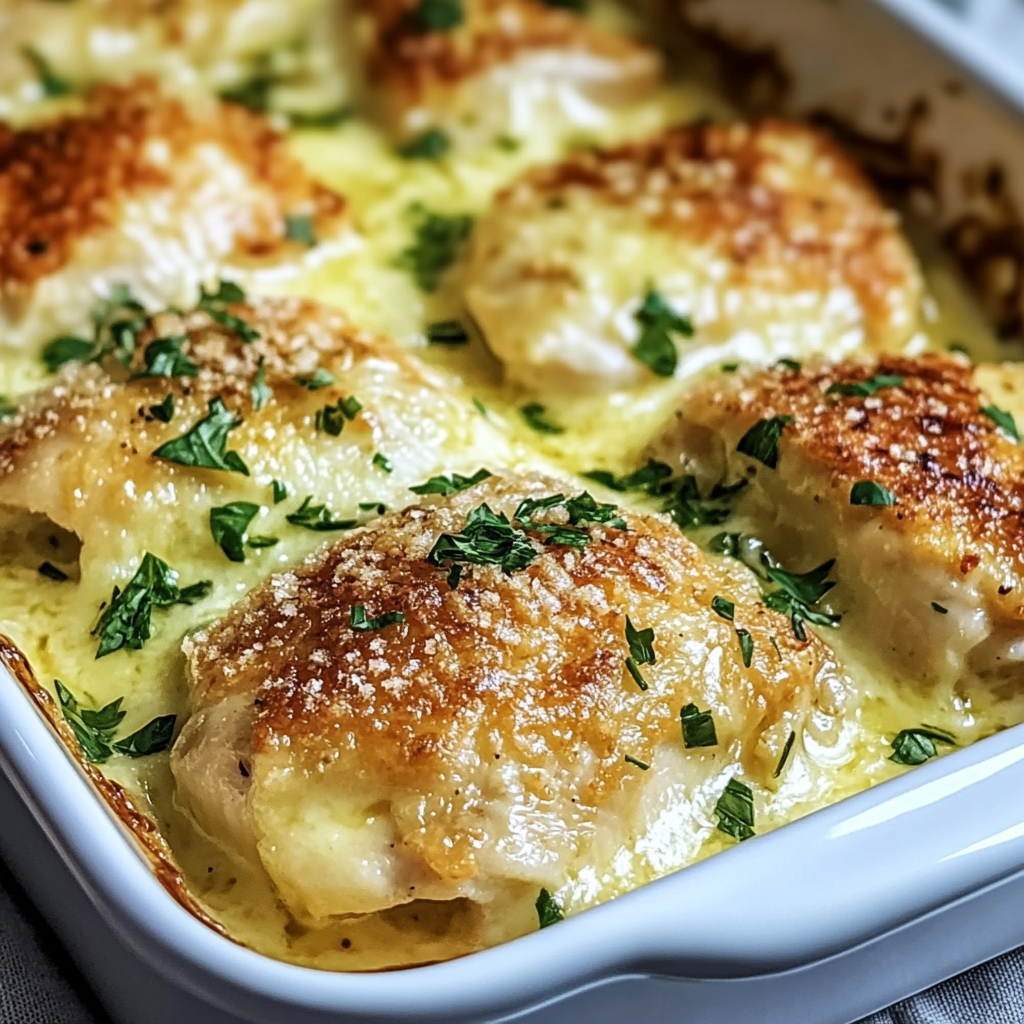
Baked Caesar Chicken
Baked Caesar Chicken is a crowd-pleasing dish featuring tender chicken coated in flavorful caesar dressing and crispy breadcrumbs. This easy-to-make recipe is perfect for any occasion and will become a regular favorite in your meal rotation.
Ingredients
- 4 boneless, skinless chicken breasts
- 1 cup caesar dressing
- 1 cup breadcrumbs
- 1/2 cup grated Parmesan cheese
- 1 tablespoon olive oil
- Salt and pepper to taste
Directions
-
Preheat your oven to 375°F (190°C).
-
Season the chicken breasts with salt and pepper on both sides.
-
In a shallow dish, combine the breadcrumbs and grated Parmesan cheese.
-
Dip each chicken breast into the caesar dressing, ensuring it's fully coated.
-
Press the chicken breasts into the breadcrumb mixture, coating them evenly.
-
Heat olive oil in a large oven-safe skillet over medium-high heat.
-
Add the chicken breasts to the skillet and cook for 3-4 minutes on each side, or until golden brown.
-
Transfer the skillet to the preheated oven and bake for 20-25 minutes, or until the chicken is cooked through and the breadcrumbs are crispy.
-
Remove from the oven and let the chicken rest for a few minutes before serving.
-
Serve hot and enjoy!